Introduction
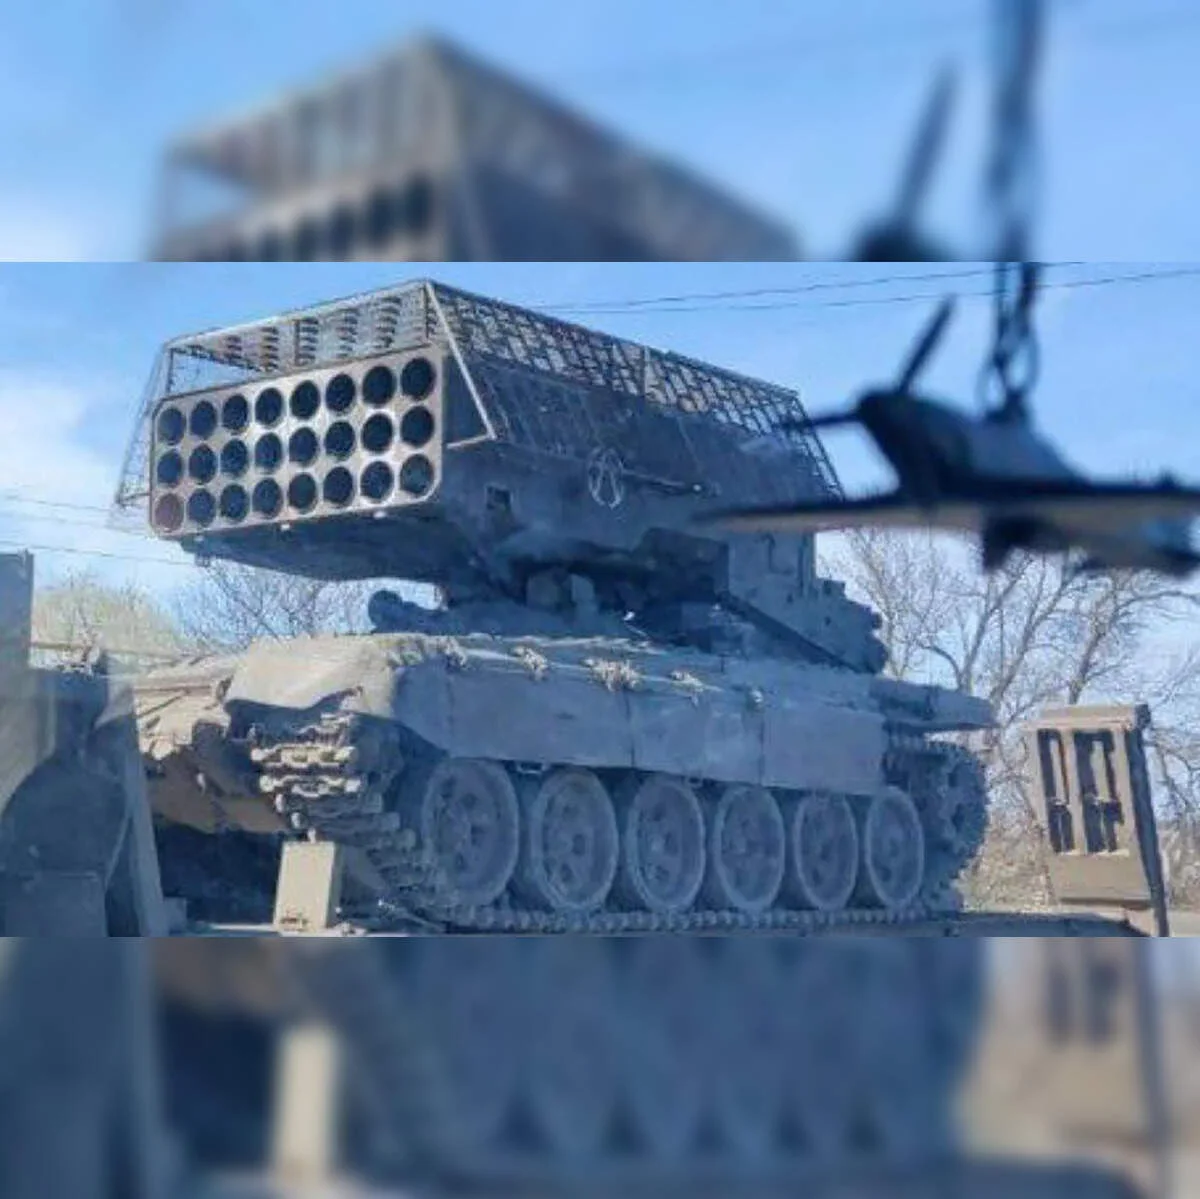
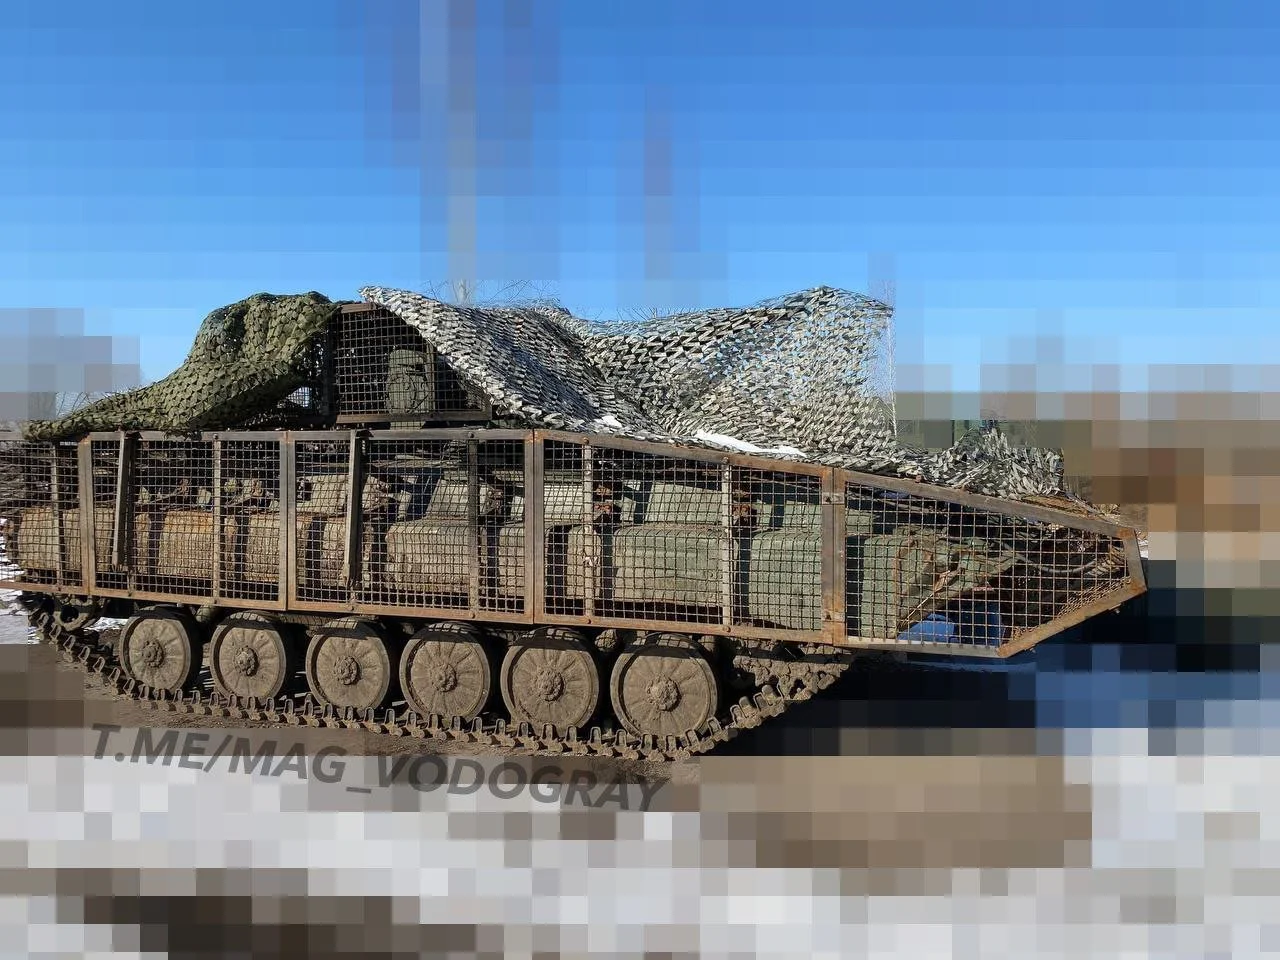
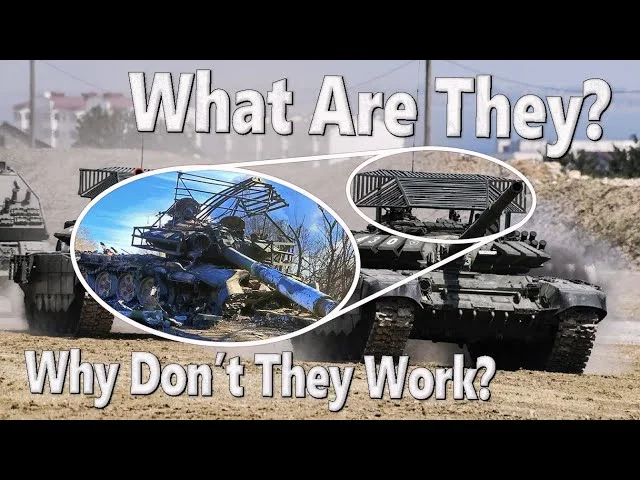
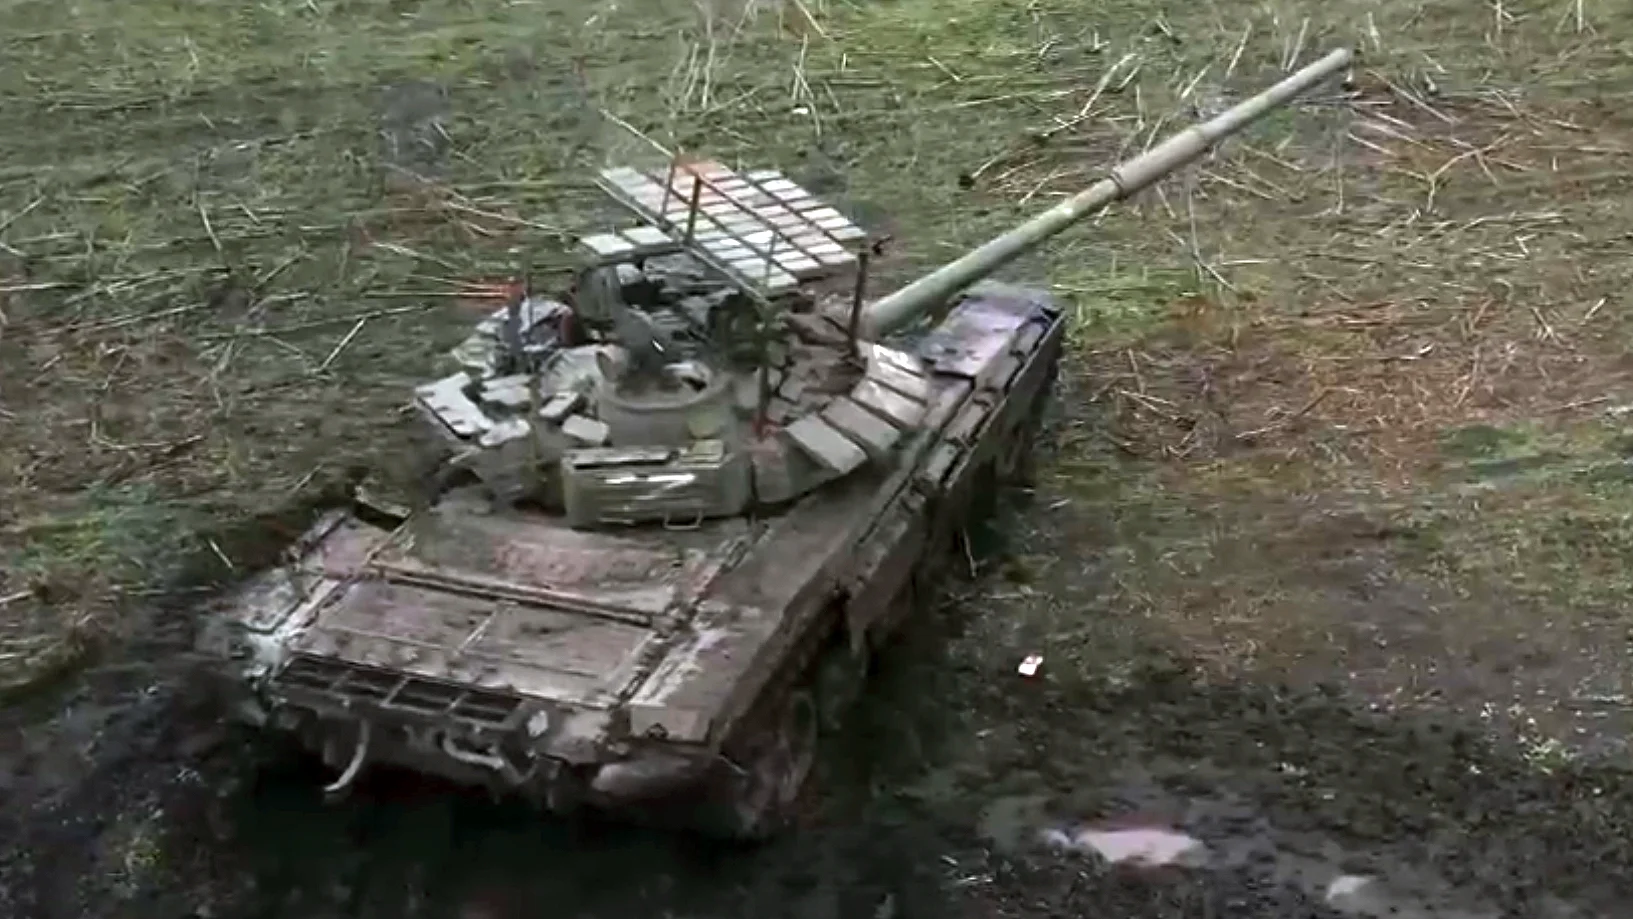
Cope cages have become an essential countermeasure on military vehicles operating under the constant threat of FPV drones, loitering munitions, and top-attack anti-tank weapons. However, the harsh realities of combat mean that even the most robust cope cage maintenance and field repair practices are critical to keeping this add-on armor effective over the long term. This guide by Dengtai provides a comprehensive reference for field maintenance crews, armorers, and vehicle operators who need to keep cope cages battle-ready under operational conditions.
Regular cope cage field maintenance is not just about preserving the structural integrity of the cage armor — it directly affects crew survivability and vehicle availability on the battlefield. A damaged or poorly maintained cope cage can fail at a critical moment, negating the protection it was designed to provide. Whether you are maintaining cages on T-72 main battle tanks, M1 Abrams, BMP infantry fighting vehicles, Leopard 2 tanks, or logistics trucks, the principles covered in this guide apply across all platforms.
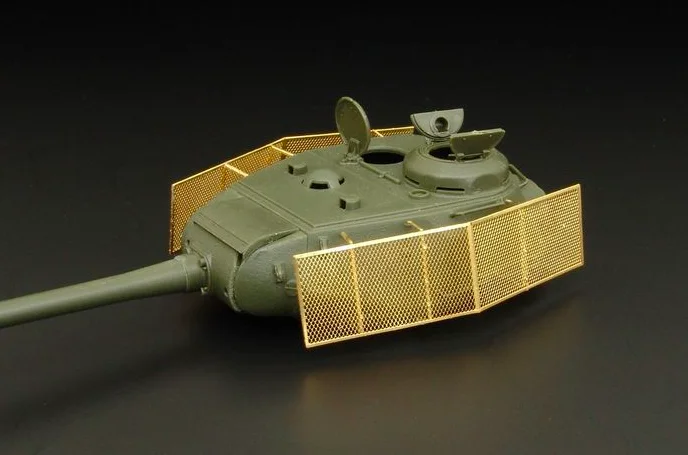
From daily visual inspections to emergency field welding of armor steel, this article covers everything you need to know to perform effective cope cage repair and maintenance in forward-deployed environments. Dengtai, a leading manufacturer of military-grade cope cages, brings decades of fabrication expertise to help you understand what it takes to keep your anti-drone cage armor in optimal condition.
Why Cope Cage Field Maintenance Matters
The battlefield of the 21st century is dominated by unmanned aerial systems. FPV drones, quadcopters dropping munitions, and loitering munitions have fundamentally changed how armored vehicles must protect themselves. A cope cage — also referred to as anti-drone cage armor or slat armor variant — creates a physical standoff barrier that defeats shaped charge warheads by prematurely initiating them at a safe distance from the vehicle hull.
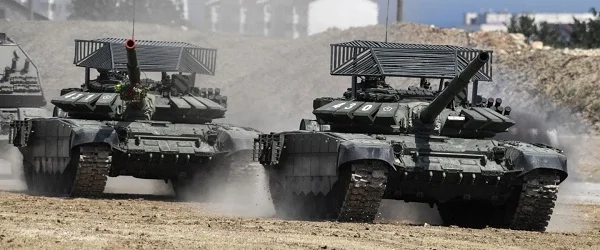
Cope cage maintenance directly determines whether this protection remains effective. Combat operations expose cope cages to extreme conditions: ballistic impacts, shrapnel, blast overpressure from nearby explosions, heavy vibration during cross-country movement, and environmental corrosion from mud, rain, sand, and salt. Without a systematic cope cage maintenance and repair regimen, these factors degrade the cage armor over time.
Consequences of Neglected Maintenance
Field reports from Ukraine have demonstrated that cope cages which receive regular inspection and timely repair maintain their protective capability much longer than neglected installations. A cope cage with broken bars, loose mounting brackets, or cracked welds can fail to properly initiate a warhead, potentially allowing the shaped charge jet to reach the vehicle armor. Moreover, loose cage components can become secondary projectiles during vehicle movement or under blast, creating additional hazards for crew and nearby personnel.
Beyond combat damage, environmental factors play a significant role. Moisture trapped between cage bars and the vehicle hull accelerates galvanic corrosion at mounting points. Sand and dust ingress into weld joints can cause hidden fatigue cracking. Regular cope cage field maintenance catches these issues before they compromise structural integrity.
The strategic importance of cope cage maintenance also extends to vehicle availability. In high-tempo operations, a vehicle that requires depot-level repair due to neglected cage damage can be out of action for weeks. Field-level maintenance — when performed correctly — keeps vehicles operational and reduces the logistical burden on rear echelon support units.
Dengtai manufactures cope cages to military-grade specifications, but even the highest-quality fabrication requires consistent maintenance to perform in combat. Understanding the materials, welding standards, and inspection criteria discussed in this guide will help field maintenance teams extend the service life of their cope cage systems significantly.
Common Cope Cage Damage and Failure Modes in the Field
Understanding the types of damage that cope cages sustain in operational environments is the first step toward effective field maintenance. Different damage mechanisms require different repair approaches, and proper diagnosis determines whether a field repair is sufficient or if depot-level work is required.
Types of Field Damage
Ballistic impact damage: The most common form of damage occurs when FPV drones, RPGs, or other munitions strike the cage bars. The cope cage performs its intended function by absorbing and disrupting the shaped charge jet, but this typically results in bent, severed, or partially melted bars at the impact zone. Multiple impacts in the same area can create large apertures that reduce coverage effectiveness.
Weld joint failure: Cope cage welds experience extreme stress during combat operations. The welding specifications for cope cage armor — typically governed by AWS D1.1 structural welding standards — must account for armor-grade steel metallurgy. Common weld defects include cracking at weld toes, incomplete fusion, porosity, and undercut. Field reports indicate that vibration-induced fatigue cracking at mounting bracket welds is particularly common on vehicles operating in rough terrain for extended periods.
Bracket and mounting system damage: The brackets that attach the cope cage to the vehicle hull or turret are often the weak point in the system. When a cage takes a direct hit, the force transfers through the mounting points. Bolted connections can shear, welded brackets can crack at the heat-affected zone, and the base plate attachment points on the vehicle hull can develop fatigue cracks.
Corrosion and environmental degradation: Armor steel used in cope cage fabrication — commonly AR400, AR500, or Hardox grades — is typically abrasion-resistant but not inherently corrosion-resistant. In humid, coastal, or wet environments, surface rust can form quickly. While surface rust on armor plate is generally cosmetic, corrosion at weld joints and mounting brackets can compromise structural integrity over time. Galvanic corrosion between dissimilar metals (such as steel cage bars bolted to aluminum vehicle hulls) is a particular concern on vehicles like the M1 Abrams and BMP series.
Criticality Assessment
When inspecting a damaged cope cage in the field, maintenance personnel should classify damage into three categories:
- Category 1 — Minor: Surface scratches, light surface rust, single bar deflection less than 10 mm. Can be addressed at next scheduled maintenance. No immediate action required.
- Category 2 — Moderate: Bent or broken bars affecting no more than 15% of cage coverage area, cracked welds without complete separation, loose mounting bolts. Requires repair within 72 hours or before next combat mission.
- Category 3 — Critical: Missing cage sections, completely severed mounting brackets, hull attachment point damage, large apertures exceeding 200 mm in any dimension. Requires immediate repair or vehicle withdrawal from combat.
This classification system helps field commanders make rapid decisions about vehicle readiness and repair priority. Dengtai recommends that all Category 3 damage be documented with photographs and reported to the maintenance chain of command for possible depot-level follow-up even after field repair.
Cope Cage Field Inspection Checklist
A systematic inspection routine is the foundation of effective cope cage maintenance. The following checklist provides a step-by-step procedure that field maintenance teams can adapt to their specific vehicle types and operational contexts.
Visual Inspection Points
Begin every inspection with a thorough visual examination of the entire cope cage structure:
- Bar condition: Inspect every bar across the cage surface for bending, cracking, or complete breakage. Pay special attention to the frontal arc and top surfaces, which receive the most direct threat exposure. Measure any bar deflection exceeding 10 mm with a straightedge.
- Weld integrity: Examine all weld joints — including bar-to-bar joints, bar-to-frame connections, and frame-to-bracket welds — for visible cracks, porosity, undercut, or incomplete fusion. Use a weld inspection gauge if available. Any crack longer than 25 mm or penetrating more than 50% of the weld throat depth requires immediate repair.
- Mounting bracket condition: Check all mounting brackets for deformation, cracking, or loosening. Verify that bolt torques are within specification. For welded brackets, inspect the heat-affected zone for signs of fatigue cracking.
- Fastener integrity: For bolted connections, verify torque values using a calibrated torque wrench. Check for missing or damaged fasteners. Replace any fastener showing signs of galling, stretch marks, or corrosion pitting.
- Paint and coating condition: Inspect the protective coating for chips, scratches, or rust breakthrough. Areas where the coating has been compromised should be spot-repaired to prevent corrosion progression.
Structural Integrity Checks
Beyond visual inspection, the following checks help assess the structural condition of the cope cage:
- Tap test: Use a light hammer to tap along weld joints. A solid ringing sound indicates good fusion; a dull or hollow sound may indicate delamination, incomplete fusion, or internal cracking.
- Dimensional tolerance verification: Verify that the cage maintains its designed standoff distance from the vehicle hull. Standard production tolerances for cope cage armor typically hold ±3 mm on bar spacing and ±2 mm on frame dimensions. Significant deviation may indicate frame distortion from impact or thermal stress.
- Flatness check: Place a straightedge across cage panels. The acceptable flatness tolerance for cope cage armor panels is typically ±3 mm over a 1-meter span. Greater deviation indicates possible frame damage requiring repair.
- Mounting point load test: Apply moderate manual force at each mounting point to check for movement. Any detectable play in the mounting system indicates worn or damaged components that must be addressed.
Document all inspection findings in a standardized format, including photographs of any damage. This creates a maintenance history that helps identify recurring problems and informs future design improvements. Dengtai provides inspection templates with every cope cage delivery to standardize field maintenance documentation.
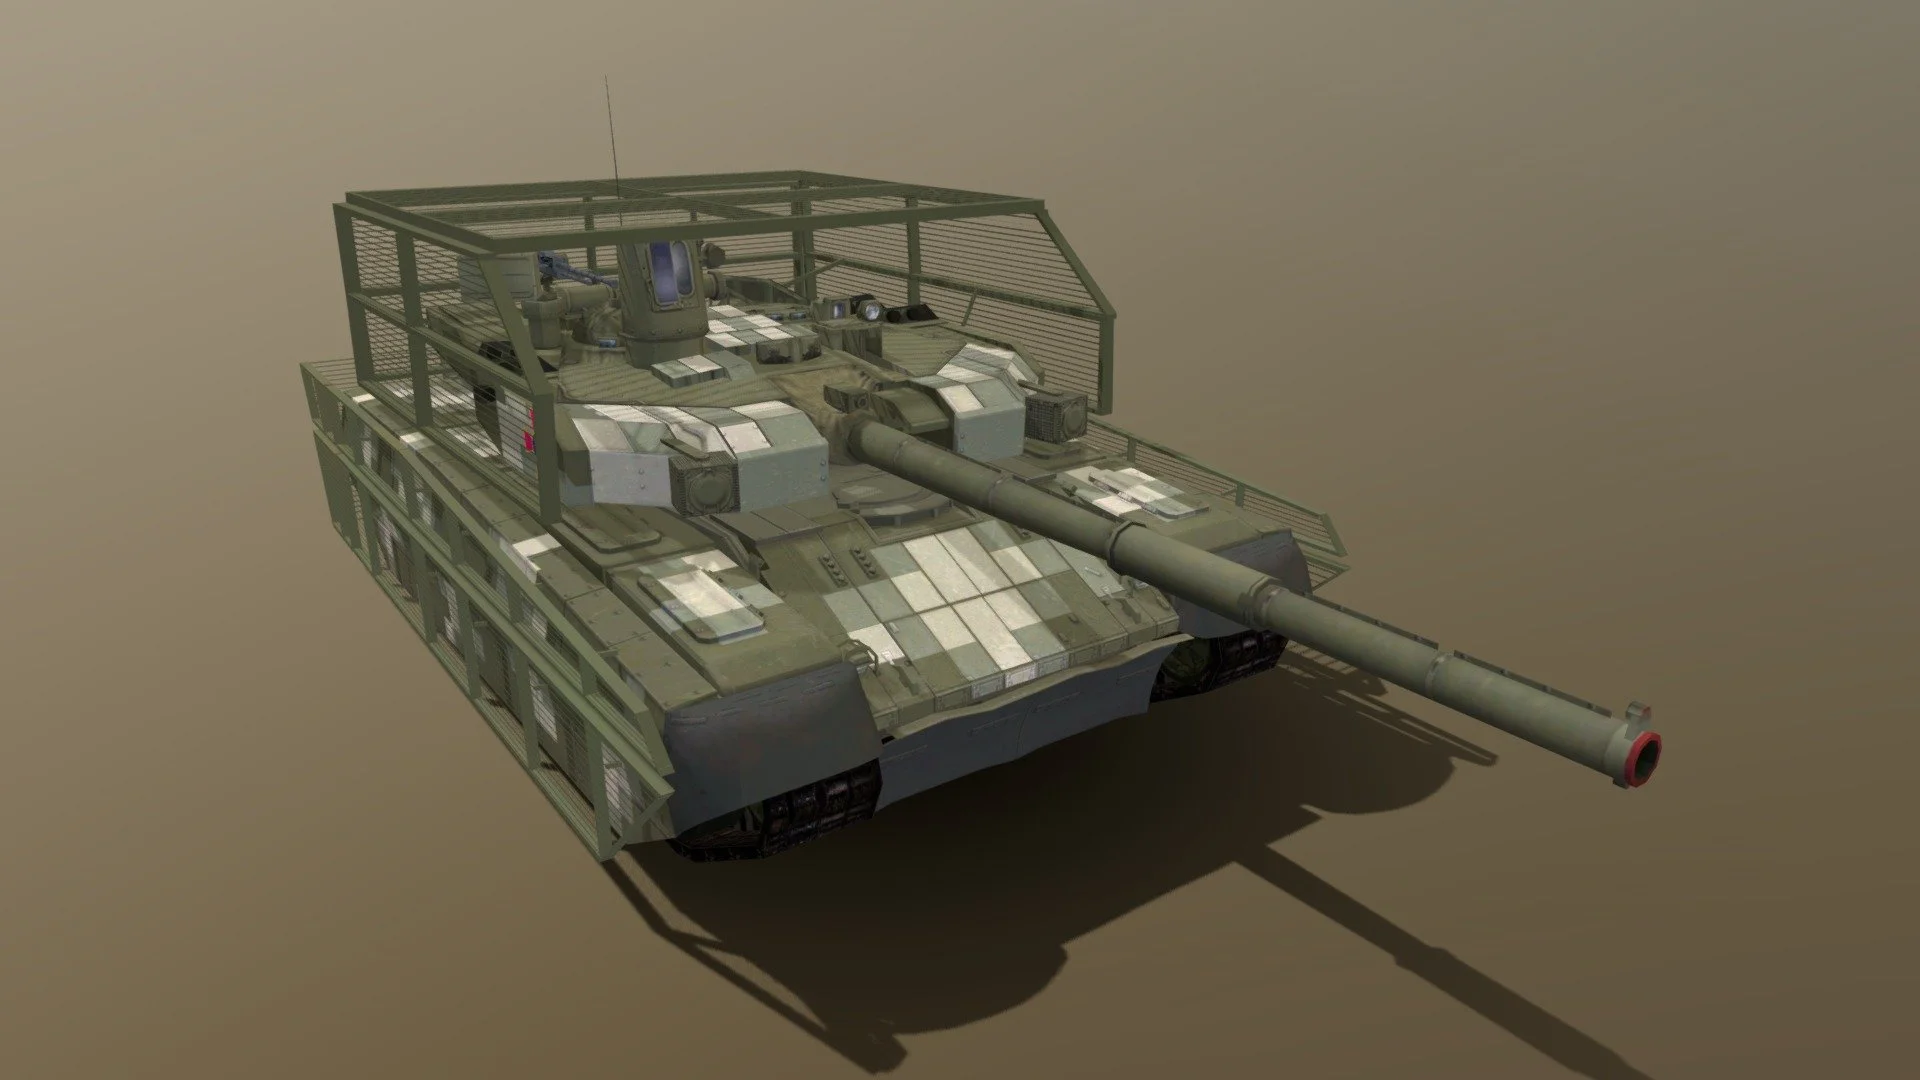
Essential Tools and Equipment for Field Repair
Performing effective cope cage field repair requires having the right tools on hand. Field repair kits should be tailored to the types of damage most likely to be encountered and the specific vehicle platforms being supported. The following equipment list represents the minimum toolkit for field-level cope cage maintenance:
Cutting and Material Removal Tools
- Angle grinder: A 4.5 to 5 inch angle grinder with cut-off wheels rated for armor steel (at least 1/8 inch thickness). Grinding discs for surface preparation and flap discs for weld cleanup are also essential. Bring at least 20 cut-off wheels per repair team — armor steel wears wheels quickly.
- Oxy-acetylene cutting torch: For cutting through heavy armor bars and structural steel. Essential when removing damaged cage sections that cannot be accessed with an angle grinder.
- Portable bandsaw: Useful for precision cuts on replacement bars. Choose a model with variable speed control for cutting hardened armor steel.
Welding Equipment
- Portable welding machine: A multi-process welder capable of both MIG (GMAW) and stick (SMAW) welding is ideal for cope cage repair in field conditions. Minimum output of 200 amps at 60% duty cycle is recommended for welding armor-grade steel. For most cope cage field repairs, MIG welding with ER70S-6 filler wire is the preferred process for its speed and ease of use. However, for thicker sections or outdoor conditions with wind, stick welding with E7018 electrodes provides better reliability.
- Welding leads and accessories: At least 50 feet of welding cable, ground clamp, electrode holder, and MIG gun. Ensure cables are rated for the amperage required by armor steel welding specifications.
- Welding helmet and PPE: Auto-darkening welding helmet with shade 10-13, welding gloves rated for high-amperage work, leather apron, and fire-resistant clothing.
- Filler materials: ER70S-6 MIG wire (0.035 or 0.045 inch diameter) for general repairs, E7018 stick electrodes (1/8 inch) for heavy sections, and stainless steel electrodes for repair of galvanized mounting components.
Inspection and Measurement Tools
- Weld inspection gauge: A multi-function weld gauge for measuring fillet weld leg size, throat depth, and reinforcement height. Essential for verifying that field repairs meet AWS D1.1 requirements.
- Calibrated torque wrench: For verifying mounting bolt torque on bolted connection systems. Range of 20-200 ft-lb covers most cope cage fastener specifications.
- Digital caliper and tape measure: For verifying dimensional tolerances on replacement bars and cage alignment.
- Straightedge and feeler gauges: For checking flatness tolerances and joint gap tolerances. The typical gap tolerance for cope cage weld joints is 1.5-3 mm depending on material thickness.
- Ultrasonic thickness gauge (optional): For measuring remaining wall thickness on hollow structural sections used in some cope cage designs.
Material Stock for Field Repairs
Maintain a stock of replacement materials matched to the cope cage designs in your fleet:
- Replacement bars: Pre-cut armor steel bars in common diameters (typically 16-25 mm round bar or equivalent flat bar) matching the original cope cage specifications. AR400 and AR500 are the most common armor steel grades used in cope cage fabrication.
- Mounting brackets: Pre-fabricated spare brackets for the most common failure points. Dengtai supplies field repair kits with pre-drilled and pre-bent brackets for each vehicle platform.
- Fasteners: Grade 8.8 or higher bolts, lock washers, and nuts in appropriate sizes. Include anti-seize compound and thread-locking compound in the kit.
- Touch-up paint: Matching military-grade epoxy paint or cold galvanizing compound for corrosion protection after weld repair.
Field Welding and Repair Procedures
Field welding of cope cage armor steel is fundamentally different from standard structural welding. The high carbon content and hardness of armor-grade steels like AR400 and AR500 require careful attention to welding parameters, preheat, and post-weld treatment to prevent hydrogen-induced cracking and maintain ballistic properties.
Welding Preparation in Field Conditions
Proper preparation is the most critical factor in achieving sound field welds on cope cages:
- Surface preparation: Remove all paint, rust, dirt, oil, and moisture from the weld area using a grinder with a flap disc. Extend the cleaned area at least 50 mm (2 inches) beyond each side of the intended weld zone. Paint and contaminants introduced into the weld pool cause porosity and lack of fusion — the most common field weld defects.
- Preheat requirements: Armor steel cope cage welding requires preheating to prevent hydrogen cracking. For AR400 steel, a minimum preheat of 150°C (300°F) is recommended for sections up to 20 mm thick. For thicker sections or AR500 steel, preheat should be increased to 200-250°C (400-480°F). Use a temperature-indicating stick or infrared thermometer to verify preheat temperature across the entire weld zone.
- Joint preparation: For butt joints, bevel the edges to achieve 60° included angle with a 1-2 mm root face. For fillet welds, ensure joint gap does not exceed 3 mm. The typical gap tolerance for cope cage weld joints is 1.5-3 mm to ensure adequate weld penetration. Adjust fit-up by grinding or adding filler material as needed.
- Moisture control: In field conditions, moisture is a constant challenge. Use a portable propane torch to dry the weld area if humidity is high. Store electrodes in a sealed container with desiccant packets — moisture in the flux coating of E7018 electrodes is a leading cause of hydrogen cracking.
Welding Techniques for Armor Steel in the Field
When performing cope cage repair welding in the field, follow these technical guidelines:
- Welding process selection: For most field cope cage repairs, MIG welding (GMAW) with ER70S-6 filler wire is recommended for its speed and operator-friendly nature. However, in windy outdoor conditions where gas shielding would be disrupted, switch to stick welding (SMAW) with E7018 electrodes. TIG welding (GTAW) is generally not practical for field conditions due to wind sensitivity and slower deposition rates.
- Weld penetration requirements: For cope cage repair, weld penetration depth should be at least 60-80% of the base material thickness. For a 16 mm armor bar, this means 10-13 mm of penetration. Achieve this by using the correct amperage range (180-220 amps for MIG on 16 mm bar) and proper travel speed.
- Weld position: Cope cage welds are typically performed in the flat or horizontal position. When repairing cages on vehicle turrets, you may encounter overhead or vertical positions. For out-of-position welds, reduce amperage by 10-15% and use a slight weave technique to control the weld pool.
- Stringer bead technique: Use stringer beads rather than wide weaves. Multiple-pass welds with individual stringer beads produce better mechanical properties than a single large weave pass. Allow interpass temperature to remain between 150-250°C.
- Post-weld cooling: After welding, allow the joint to cool slowly. Cover the weld area with a thermal blanket or dry sand to retard cooling. Rapid cooling of armor steel welds can create hard, brittle martensite in the heat-affected zone that is susceptible to cracking.
- Post-weld heat treatment (PWHT): For critical structural welds on cope cages — particularly mounting brackets and frame connections — stress relief heat treatment at 250-300°C for one hour per 25 mm of thickness helps reduce residual stresses. In field conditions, this can be achieved using multiple propane torches or a portable induction heater. However, for most non-critical bar repairs, controlled slow cooling is sufficient.
Common Field Welding Defects and Prevention
| Defect | Cause | Prevention |
|---|---|---|
| Hydrogen cracking | Insufficient preheat, moisture in electrodes | Proper preheat, dry electrode storage |
| Porosity | Contaminated surface, wind disrupting shielding gas | Thorough cleaning, wind screens for MIG |
| Lack of fusion | Low amperage, incorrect gun angle | Increase amperage, maintain 10-15° push angle |
| Weld distortion | Excessive heat input, poor joint fit-up | Use tack welds, backstep technique, proper joint gap |
Field Installation and Retrofit Guidelines
Field installation of cope cages — whether fitting a new cage to a vehicle that arrived without one, replacing a damaged cage, or retrofitting an improved design — requires careful planning and execution. The ability to install or retrofit anti-drone cage armor in the field has become increasingly important as threat environments evolve faster than depot-level modification programs can respond.
Retrofitting Cope Cages in the Field
Retrofitting cope cages in the field presents unique challenges compared to factory installation. The vehicle structure may require modification, mounting points must be fabricated on-site, and the work must be completed under time pressure with limited resources. Consider these key factors:
- Vehicle preparation: Before mounting any cage structure, thoroughly clean the mounting areas on the vehicle hull or turret. Remove any existing equipment or appliqué armor that would interfere with the cage installation. For vehicles like the BMP-2 and BMP-3, the existing stowage baskets and external equipment boxes often need repositioning or removal.
- Mounting bracket fabrication: When no pre-designed mounting kit is available, brackets must be fabricated from steel plate matching the vehicle hull material. For most armored vehicles, brackets should be made from 8-12 mm steel plate with reinforcing gussets at stress points. The bracket design must avoid interfering with hatches, periscopes, weapon systems, and engine access panels.
- Hull attachment considerations: Bolted attachments are preferred for field installation because they can be removed if needed and avoid the risk of damaging vehicle armor through welding. When welding on a vehicle hull is necessary, use low-hydrogen welding procedures and ensure the vehicle electronic systems are disconnected and protected from welding current. Never weld directly to vehicle armor plate without engineering approval — this can create stress risers that compromise ballistic protection.
- Standoff distance verification: Maintain the designed standoff distance between the cope cage and the vehicle hull. Standard cope cage designs typically maintain 200-400 mm standoff to allow shaped charge jets to develop fully before contacting the cage bars. Verify this dimension at multiple points around the installation.
Vehicle-Specific Mounting Considerations
Different vehicle platforms require different mounting approaches for cope cage installation:
- T-72/T-90 series: The cope cage typically mounts on the turret roof using brackets that attach to existing lifting eyes and periscope mount bolts. Care must be taken to ensure the cage does not interfere with turret rotation. Additional mounting points may be welded to the turret sides for frontal arc protection. The standard T-72 cope cage installation preserves access to the commander and loader hatches.
- M1 Abrams: Abrams cope cages use a frame system that mounts to the turret bustle rack attachment points and the loader hatch surround. The cage must clear the commander machine gun mount and the CITV periscope. Field reports from Ukraine have documented successful Abrams cope cage installations using bracket kits adapted from the T-72 design with vehicle-specific modification.
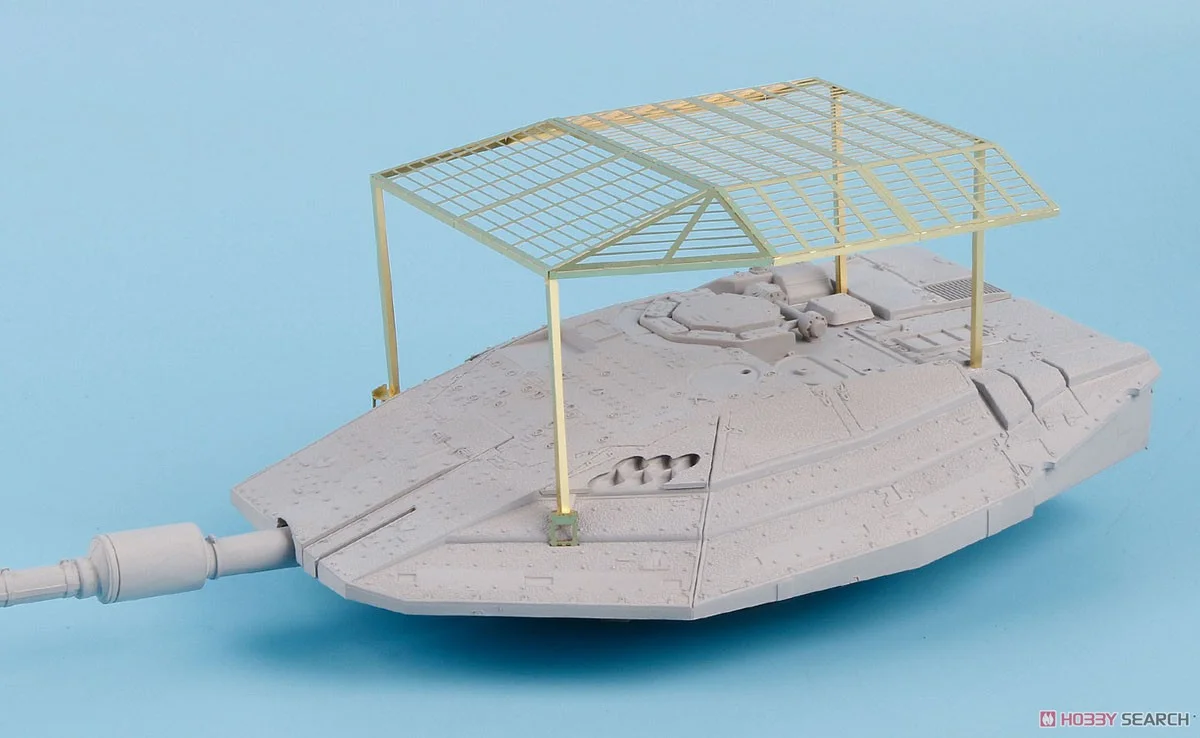
- Leopard 2: Leopard 2 cope cages commonly mount to the turret roof using brackets that attach to existing structural weldments. The Leopard 2 flat turret roof provides an excellent mounting surface. The cage can be retrofitted in the field using a prepared bracket kit that attaches to the loader hatch ring and the commander periscope base.
- BMP series: BMP cope cages require a different approach because the vehicle is smaller and has less available roof space. The cage typically covers the troop compartment roof and engine deck area. Mounting brackets attach to existing grab handles, periscope mounts, and stowage rack brackets. BMP-2 and BMP-3 installations must preserve access to the rear troop hatches and the engine compartment for maintenance.
- Logistics trucks and artillery: For soft-skinned vehicles and artillery systems, cope cages are typically mounted on a frame that attaches to the vehicle chassis or gun carriage. These installations often require more extensive field fabrication, as factory mounting points generally do not exist. Dengtai provides universal mounting kits for these applications with adjustable brackets that accommodate different vehicle configurations.
Cope Cage Maintenance Schedule and Best Practices
Establishing a regular maintenance schedule is essential for maximizing cope cage service life and ensuring protection is available when needed. The following schedule is based on operational experience and Dengtai recommended practices for military-grade cope cage systems.
Daily Pre-Mission Inspection (5-10 minutes)
- Visual check for obvious damage — bent bars, missing sections, loose brackets
- Verify all mounting fasteners are present and visually tight
- Check for any obstructions to vehicle hatches, weapon systems, or optics
- Remove any debris, vines, or camouflage netting caught in the cage structure
- Document and report any new damage to the chain of command
Weekly Deep Inspection (30-45 minutes)
- Perform the full inspection checklist described earlier
- Torque-check all bolted connections to specification
- Tap-test all accessible weld joints
- Measure and record bar deflection at any potential impact zones
- Inspect for corrosion at mounting points and dissimilar metal interfaces
- Touch up any damaged paint or coating
Monthly Comprehensive Inspection (1-2 hours)
- Complete all weekly inspection items
- Perform dimensional tolerance checks on cage frame and bar spacing
- Flatness check across all cage panels
- Detailed weld inspection using weld gauge where accessible
- Check for hidden damage behind stowage items or equipment mounted near the cage
- Lubricate any moving parts (hinged panels, quick-release mechanisms)
- Review maintenance log for recurring issues on specific vehicles
Post-Engagement Inspection (Immediate after combat)
- Full visual and tap-test inspection focusing on the threat arc
- Check for any FPV drone debris lodged in the cage structure
- Test all mounting points for stability
- Classify any damage per the Category 1-3 system
- Perform emergency field repair for Category 3 damage before next mission
- Schedule Category 2 repair within 72 hours
Quarterly Depot-Level Service
Every 3-4 months (or after 500 operating hours), the cope cage should receive depot-level attention:
- Remove the cage from the vehicle for full inspection
- NDT inspection of all critical welds — magnetic particle inspection (MPI) for surface cracks, ultrasonic testing for subsurface defects
- Complete dimensional and flatness verification against original fabrication drawings
- Replacement of any fasteners showing wear or corrosion
- Full repainting or recoating as needed
- Verification that the cage still meets the vehicle current operational requirements
Maintenance Cost Considerations
Understanding the maintenance cost after cope cage installation is important for budget planning. Field-level maintenance costs are typically low — primarily labor time and consumables like grinding wheels, welding wire, and paint. The cost of cope cage field maintenance generally runs 2-5% of the original fabrication cost per year under normal operational conditions. However, units operating in high-threat environments where cages sustain frequent damage should budget 10-15% annually for replacement parts and repair labor. Comparing cope cage cost vs slat armor cost over a 5-year lifecycle, cope cages typically have lower total ownership costs because individual bar replacement is simpler and faster than slat armor panel replacement.
Field Repair vs Depot-Level Maintenance: Decision Guide
Not every cope cage damage situation requires the same level of response. Understanding when a field repair is appropriate versus when the vehicle should be sent to depot-level maintenance is critical for operational readiness and crew safety.
When Field Repair Is Appropriate
Field-level maintenance is suitable for the following situations:
- Single bar replacement: One or two adjacent bars are bent, broken, or missing. Replacement bars can be cut to length, fitted, and welded in place using standard field welding procedures.
- Weld crack repair: Surface cracks in non-critical weld joints that do not extend into the base metal. The cracked weld can be ground out and re-welded in the field if proper preheat is applied.
- Bracket tightening or replacement: Loose or damaged mounting brackets that do not involve damage to the vehicle hull attachment point. Bolted brackets can be replaced in minutes; welded brackets require grinding and re-welding.
- Corrosion treatment: Surface rust and light corrosion that has not penetrated more than 10% of the base material thickness. Grinding and touch-up painting is sufficient.
- Field retrofit of additional protection: Adding ERA (Explosive Reactive Armor) panels to an existing cope cage structure, provided the mounting brackets can support the additional weight.
When Depot-Level Maintenance Is Required
The following scenarios require the vehicle to be sent to a maintenance depot or the cage to be removed and sent to a fabrication facility:
- Extensive structural damage: More than 30% of the cage structure is damaged or missing. Frame members are bent or cracked beyond straightening. The entire cage section may need to be replaced.
- Vehicle hull damage: The mounting points on the vehicle hull or turret are damaged, cracked, or deformed. Welding on vehicle armor plate requires controlled conditions and qualified procedures that are not available in forward field locations.
- Ballistic compromise of vehicle armor: If a munition penetrated the cope cage and damaged the vehicle base armor, both the cage and the vehicle require depot-level assessment and repair.
- Design modification or upgrade: Changing the cope cage design to address a new threat type (e.g., larger FPV drones with enhanced warheads) requires fabrication-level modification that should be performed by the original manufacturer or a qualified fabrication facility.
- Full cage replacement: When a cope cage has reached the end of its service life due to accumulated damage, fatigue, or corrosion, complete replacement is more cost-effective than extensive field repair.
- Welding certification requirements: Any weld that must meet military ballistic welding certification standards should not be performed in the field unless a certified welder is available with calibrated equipment and proper procedures.
Decision Matrix
| Damage Type | Extent | Field Repair? | Time Estimate |
|---|---|---|---|
| Single bent bar | < 10 mm deflection | Yes, re-straighten | 15-30 min |
| Broken bar (1-2 bars) | Clean break | Yes, cut and replace | 45-90 min |
| Weld crack (minor) | < 50 mm length | Yes, grind and reweld | 30-60 min |
| Bracket damaged | Bracket only | Yes, replace bracket | 30-45 min |
| Frame damage | > 30% cage area | No, depot required | 2-5 days |
| Hull mount damage | Any | No, depot required | 3-7 days |
| Multiple impacts | > 5 broken bars | Maybe, assess case-by-case | 4-8 hours |
Dengtai offers rapid-response field support kits and technical documentation to assist field maintenance teams in making these decisions. When in doubt, err on the side of caution and consult with the manufacturer or a qualified armor engineer before committing a damaged cope cage to combat operations.
Conclusion
Effective cope cage maintenance and field repair is not an afterthought — it is a critical enabler of armored vehicle survivability on the modern battlefield. As the FPV drone threat continues to evolve, the cope cage has proven itself as one of the most cost-effective and immediately deployable countermeasures available to ground forces. But a cope cage is only effective when it is intact, properly mounted, and structurally sound.
This guide has covered the complete spectrum of cope cage care — from understanding common damage mechanisms and performing systematic inspections to executing field welding repairs and deciding when depot-level service is necessary. The key takeaways for field maintenance teams are:
- Establish a regular inspection rhythm at daily, weekly, monthly, and post-engagement intervals. Consistency catches problems before they become critical.
- Invest in the right tools. A well-equipped field repair kit with proper welding capability, inspection gauges, and replacement materials makes the difference between a 30-minute repair and a vehicle evacuation to depot.
- Follow proper welding procedures for armor steel. Preheat, controlled cooling, and appropriate filler materials are non-negotiable for producing sound welds on cope cage structures.
- Know your limits. Some damage is beyond the scope of field repair, and sending a vehicle to depot is the safer and more cost-effective decision in the long run.
At Dengtai, we design our cope cages with field serviceability in mind. Every cage we manufacture includes accessible mounting points, standardized bar spacing that simplifies field replacement, and comprehensive technical documentation for maintenance personnel. We also offer custom cope cage fabrication services for units that require vehicle-specific designs or modifications to existing installations.
Whether you are retrofitting cope cages in the field for the first time or refining a mature maintenance program, the principles in this guide will help you keep your anti-drone cage armor in fighting condition. For questions about specific vehicle platforms, custom fabrication, or to request a copy of our cope cage field maintenance checklist templates, contact the Dengtai technical support team.
Your crew depends on their cope cage. Keep it maintained, keep it repaired, and keep it effective.