Introduction
The rapid proliferation of unmanned aerial vehicles (UAVs) on the modern battlefield has created an urgent need for effective countermeasures. Among the most practical and cost-effective solutions is fitting anti drone cage armor onto military vehicles — a physical barrier system designed to intercept, deflect, or neutralize incoming drone threats before they can impact the vehicle. Whether you are outfitting a light tactical vehicle, a main battle tank, or a logistics truck, understanding the correct anti drone cage armor installation procedure is critical to ensuring both crew safety and mission readiness.
This comprehensive guide walks through every aspect of the installation process. We cover the steel thickness specifications you need, the tools required, step-by-step mounting procedures, field installation feasibility, and what to expect in terms of time and labor. By the end, you will have a complete understanding of how to fit anti-drone cage armor on a vehicle properly and effectively.
Understanding Anti Drone Cage Armor and How It Works
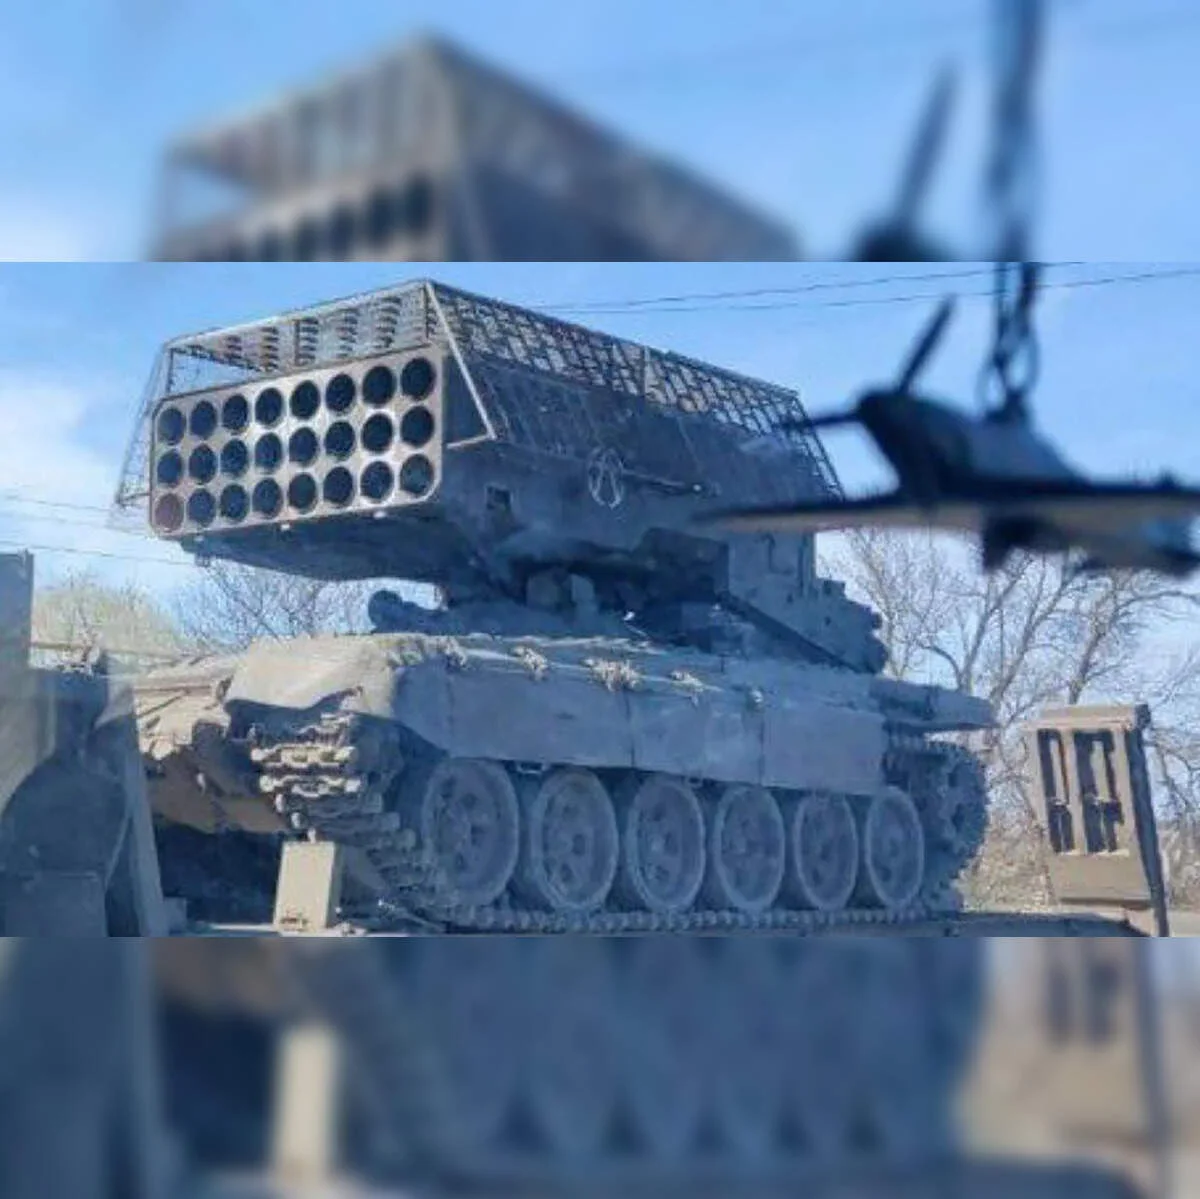
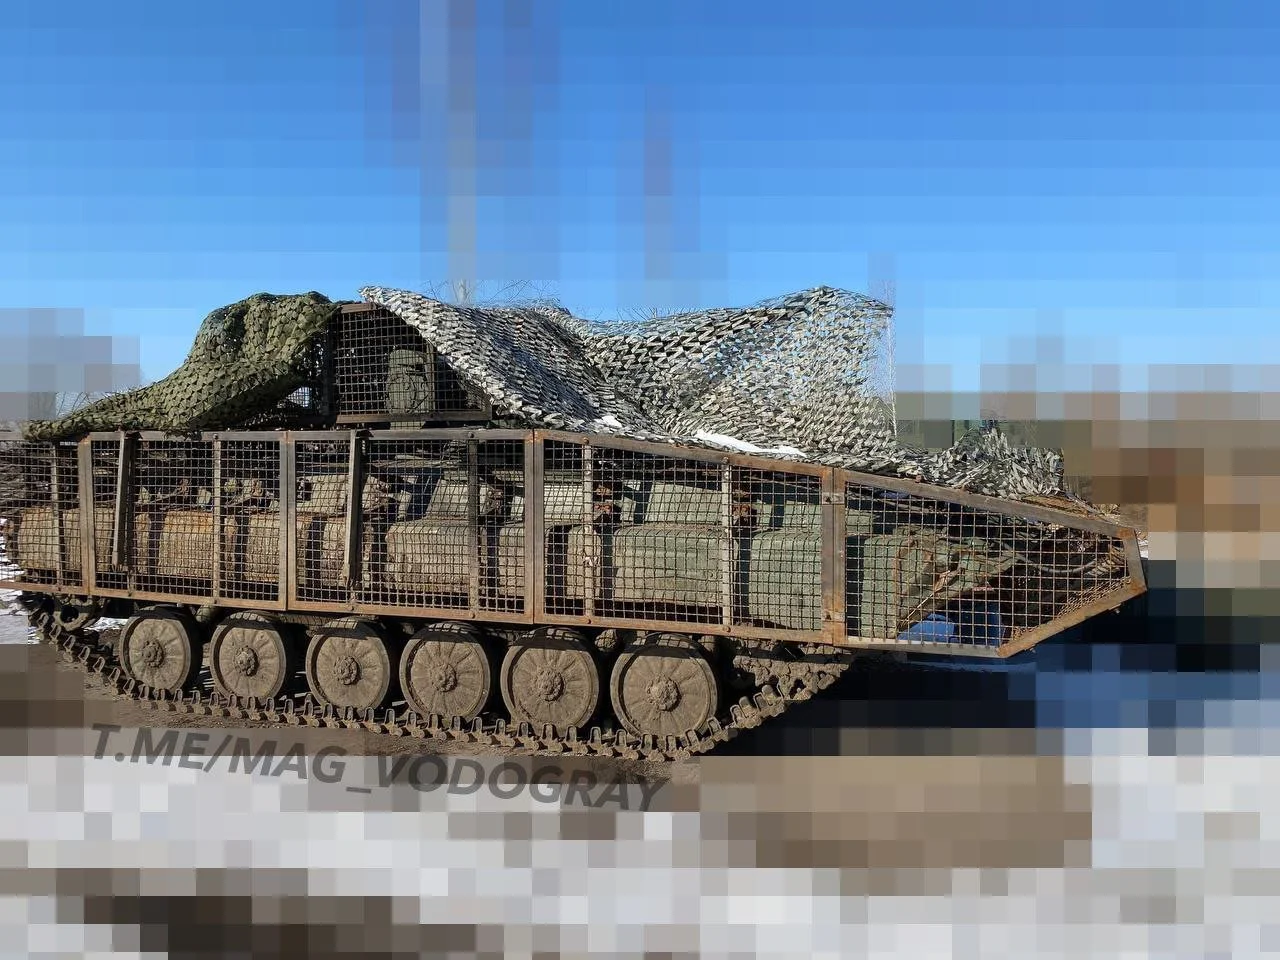
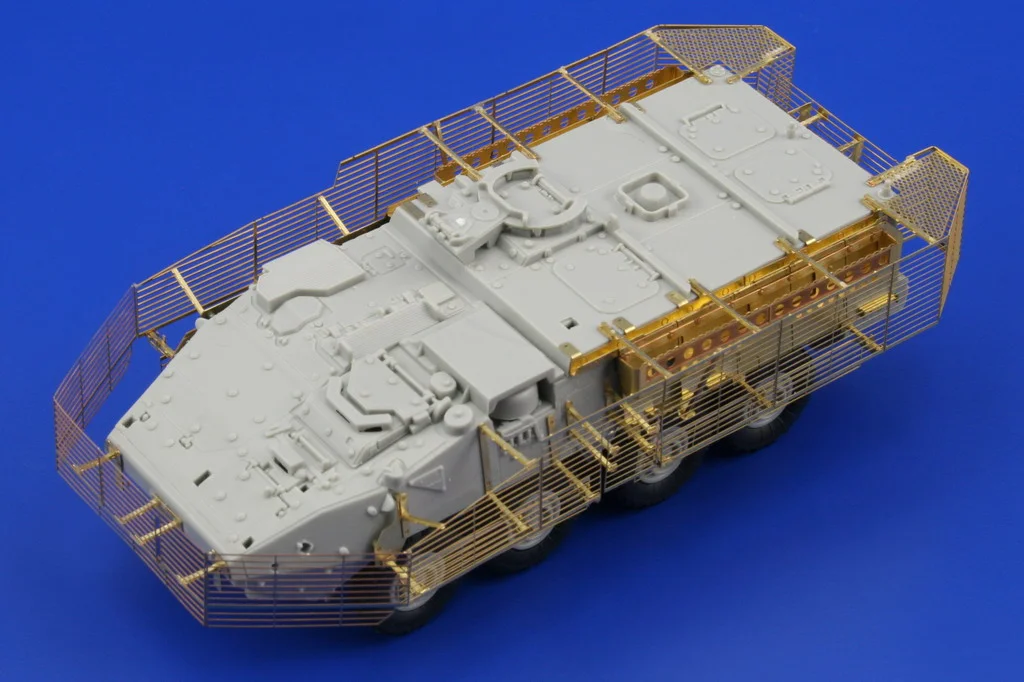
Anti-drone cage armor, also referred to as slat armor or cage armor, is a physical protection system mounted externally on military vehicles. It consists of a steel frame covered with perforated steel panels, expanded metal mesh, or steel bars arranged at a standoff distance from the vehicle hull. The principle is simple but effective: when a drone — particularly a first-person-view (FPV) drone carrying an explosive warhead — strikes the cage, the warhead detonates at a safe distance from the vehicle main armor, significantly reducing penetration and damage.
Do Anti Drone Cages Work Against Drone Attacks?
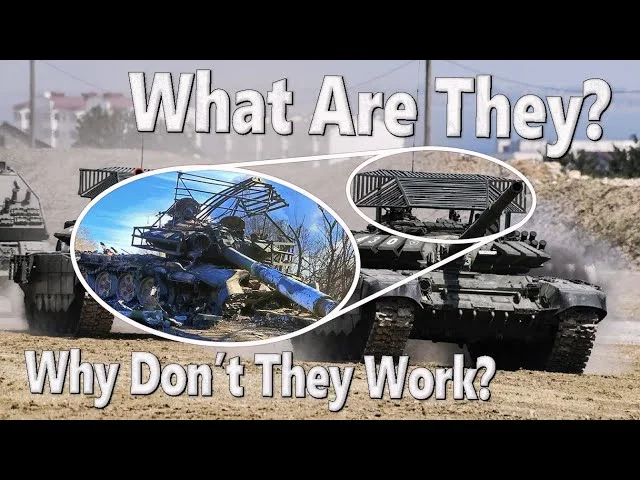
Do anti drone cages work? This is the first question most commanders ask. The answer is a definitive yes for the most common battlefield drone threats. Field reports from contemporary conflicts demonstrate that vehicles equipped with anti-drone cage armor have survived FPV drone strikes that would have otherwise disabled or destroyed the vehicle. The key mechanism is standoff detonation: the cage triggers the drone warhead before it reaches the hull, dispersing the shaped charge jet or fragmentation at a distance where it cannot penetrate the primary armor.
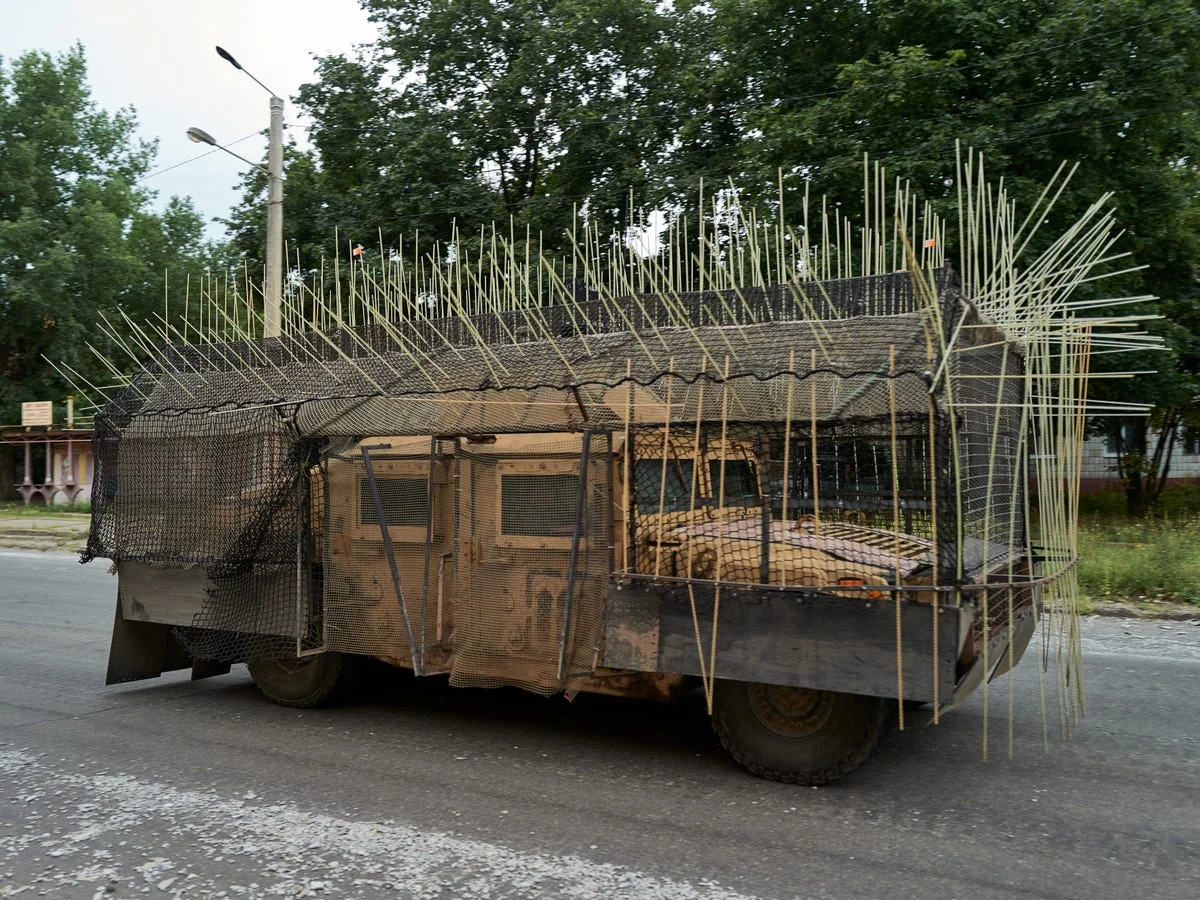
However, effectiveness depends heavily on proper installation. A poorly installed cage with gaps, weak mounting points, or insufficient structural support can fail catastrophically. The cage must be rigid enough to withstand the impact forces and maintain the critical standoff distance across all likely attack angles.
How Effective Are Anti Drone Cages Against FPV Drones?
FPV drones represent the most immediate and widespread threat to military vehicles today. These low-cost, highly maneuverable platforms can carry RPG warheads, mortar shells, or custom IED payloads directly into vulnerable areas of a vehicle. Anti-drone cages are particularly effective against FPV drones because the physical impact with the cage occurs at relatively low velocities (typically 50-100 km/h), meaning the cage structure can reliably intercept and trigger the warhead.
The effectiveness of anti-drone cages against FPV drones approaches 80-90% when the cage is properly designed and installed, according to field data and armor manufacturers. The combination of standoff distance (typically 200-400 mm from the hull) and robust steel construction ensures that most FPV drone strikes are neutralized before reaching the vehicle vital areas.
Steel Thickness Guide for Anti Drone Cage Armor
One of the most frequently asked questions when planning an anti drone cage armor installation concerns steel thickness. The right thickness directly determines whether the cage can stop a drone impact without collapsing, while also managing the weight burden on the vehicle. Below we break down the specific thickness recommendations for different threat levels and vehicle types.
What Is the Minimum Steel Thickness to Stop a FPV Drone Impact?
The minimum steel thickness to reliably stop a FPV drone impact is 3 mm (approximately 11 gauge). At this thickness, standard structural steel (ASTM A36 or equivalent) provides enough strength to withstand the kinetic energy of a typical FPV drone weighing 2-5 kg traveling at 50-100 km/h. The cage frame members should be at least 3 mm thick, while the mesh or perforated panels should use a minimum of 2.5 mm material.
However, 3 mm is considered the absolute minimum for light threats only. For military operations where repeated strikes or larger drones are possible, a minimum of 4 mm is strongly recommended for the frame and 3 mm for the mesh panels.
Optimal Steel Thickness for Tank Top Armor Cages
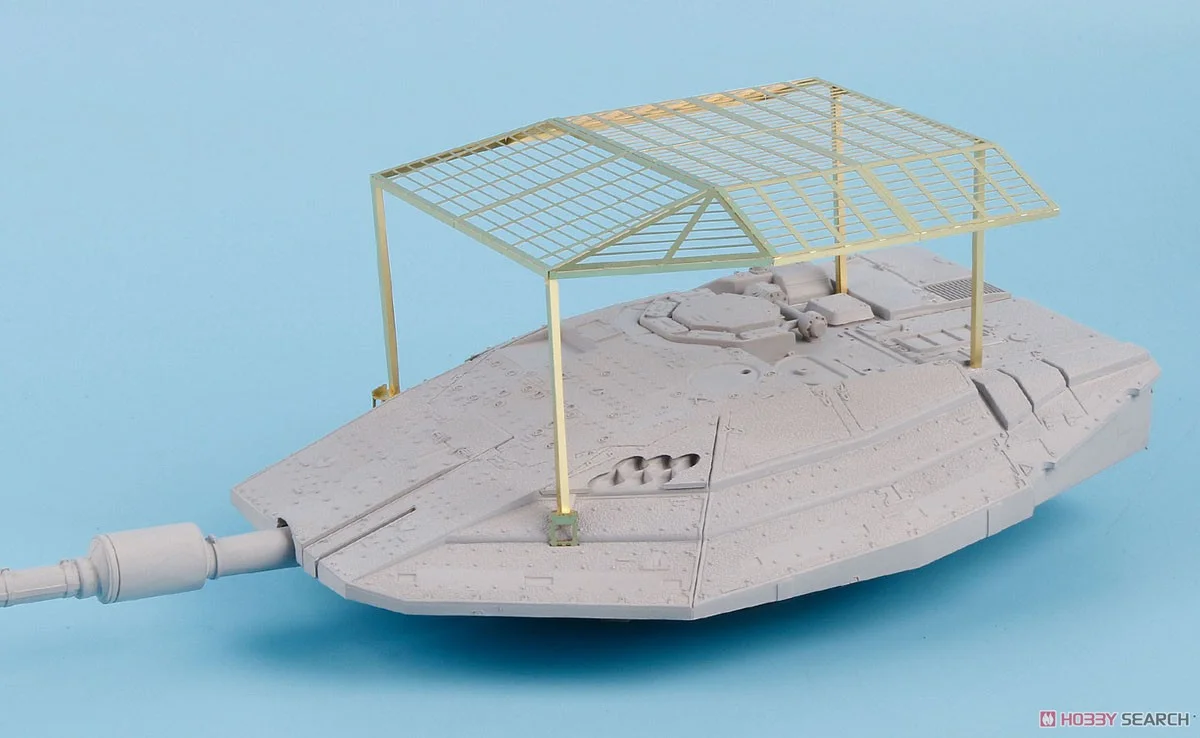
For tank top armor cages — the roof-mounted protection on main battle tanks — the optimal steel thickness is 5-6 mm for frame components and 4-5 mm for the mesh or perforated panels. Tank top cages face a unique threat profile: drones diving from above with a steep attack angle, often carrying larger warheads. The cage must not only stop the drone but also maintain structural integrity if the warhead detonates on the cage surface.
Dengtai, a leading manufacturer of anti-drone cage armor, uses 5 mm steel for the primary frame structure on tank top configurations, with a 50×50 mm grid pattern of perforated steel at 4 mm thickness. This combination provides an optimal balance of protection and weight, typically adding 400-600 kg to the vehicle roof — well within the payload capacity of modern main battle tanks.
Recommended Steel Thickness for Different Threat Levels
| Threat Level | Frame Thickness | Mesh/Panel Thickness | Typical Weight (per m²) |
|---|---|---|---|
| Light (commercial drones, small FPV) | 3 mm | 2.5 mm | 25-30 kg |
| Medium (military FPV, small UAVs) | 4 mm | 3 mm | 35-45 kg |
| Heavy (large FPV, military-grade UAVs) | 5-6 mm | 4-5 mm | 50-70 kg |
| Extreme (loitering munitions, heavy UAVs) | 8-10 mm | 6-8 mm | 80-120 kg |
The anti drone cage armor steel thickness you select should be matched to the specific operational threat environment. For most frontline applications, 4-5 mm steel provides a practical balance that stops the majority of FPV and small UAV threats without overburdening the vehicle suspension or drivetrain.
Step-by-Step Anti Drone Cage Armor Installation on Military Vehicles
This section provides the complete operational procedure for fitting anti-drone cage armor on a military vehicle. The process is broken into five logical phases, each with specific tools, techniques, and quality checks.
Tools Needed for the Installation
Before beginning, gather the following tools and equipment:
- Welding equipment: MIG or stick welder capable of welding structural steel up to 6 mm thickness. For field work, a portable inverter welder is recommended.
- Cutting tools: Angle grinder with cutting discs for steel, plasma cutter (if available), or oxy-acetylene torch for field cutting.
- Drilling equipment: Heavy-duty magnetic drill or handheld drill with cobalt drill bits for steel up to 12 mm.
- Fasteners: High-strength Grade 8.8 or 10.9 bolts, lock washers, and Nylock nuts. For permanent installations, welding is preferred over bolting.
- Measuring and marking: Steel tape measure, combination square, center punch, soapstone marker.
- Lifting equipment: Vehicle hoist or jacks, chain blocks, or a small crane for positioning heavy cage sections.
- Safety gear: Welding helmet with proper shade, heavy welding gloves, grinding visor, ear protection, fire extinguisher.
- Additional materials: Primer and paint for corrosion protection, rubber gaskets for anti-vibration mounting, anti-seize compound for bolts.
Pre-Installation Assessment and Vehicle Preparation
A successful installation begins with a thorough vehicle assessment:
- Survey mounting surfaces: Identify all potential attachment points on the vehicle hull, turret, and roof. Look for existing bolt holes, lifting lugs, tie-down rings, and rail systems that can serve as mounting anchors without drilling into the armor.
- Measure available standoff distance: The cage must be positioned 200-400 mm from the hull surface. Verify that this standoff does not interfere with turret traverse, weapon elevation, hatches, vision blocks, or driver periscopes.
- Clean and prepare surfaces: Remove any dirt, grease, or loose paint from all attachment areas. Apply rust inhibitor to any exposed metal.
- Mark mounting points: Using the cage kit template or your own measurements, mark all bolt-hole locations or weld points on the vehicle. Double-check symmetry and alignment.
- Verify weight distribution: Confirm that the cage weight does not exceed the vehicle payload capacity or unbalance the suspension. For tank top cages, ensure the center of gravity remains within acceptable limits.
Mounting the Base Frame and Support Brackets
The base frame is the structural backbone of the entire system:
- Assemble the main frame rails on the ground first. Use the pre-cut steel sections (typically 40×40 mm or 50×50 mm square tubing at 4-5 mm wall thickness) to form the perimeter of each cage panel.
- Weld or bolt the support brackets to the frame at the pre-marked attachment points. Each bracket should be designed to distribute load across at least 100 cm² of the vehicle surface.
- Lift and position the frame using lifting equipment. For large panels, a minimum of two technicians is required. Secure temporarily with clamps or straps.
- Verify alignment using a level and tape measure. The frame must be parallel to the vehicle hull and maintain consistent standoff distance. Adjust as needed.
- Tack weld or bolt the brackets to the vehicle at the marked points. Bolt holes should be drilled with a step drill to avoid damaging the vehicle armor. If welding on armored steel, use low-hydrogen electrodes and preheat per the armor manufacturer specification.
- Complete all welds or fully torque all bolts. For bolted connections, apply anti-seize to threads and torque to the specified value (typically 80-120 Nm for M12 Grade 8.8 bolts).
Attaching the Steel Mesh or Perforated Panels
Once the frame is secure, the protective infill is attached:
- Position the mesh or perforated panels on the inside face of the frame (between the frame and the vehicle hull). This arrangement ensures that the frame absorbs the initial impact and the mesh catches any debris.
- Secure at each intersection point using self-tapping screws, spot welds, or wire ties depending on the kit design. Spacing between fasteners should not exceed 200 mm to prevent panel separation under impact.
- Overlap adjacent panels by at least 50 mm to eliminate gaps. Gaps as small as 30 mm can allow a small drone rotor arm to penetrate and detonate the warhead against the hull.
- Install anti-spall lining if included in the kit. This rubber or Kevlar backing prevents secondary fragmentation from the cage itself.
Securing and Finalizing the Installation
- Inspect every weld and fastener. Tap welds with a hammer to check for defects. Re-torque all bolts after 24 hours to account for settling.
- Test all vehicle functions: Cycle the turret (if applicable), open and close all hatches, check driver visibility, test weapon elevation and traverse. Verify that nothing binds or restricts normal operation.
- Apply corrosion protection: Paint all welds, cut edges, and exposed steel with military-grade primer and CARC (Chemical Agent Resistant Coating) paint matching the vehicle scheme.
- Document the installation: Photograph all attachment points, record torque values, and add the cage weight to the vehicle load manifest.
- Conduct a shake test: Drive the vehicle over rough terrain for 5-10 minutes, then re-inspect all fasteners and welds for loosening or cracking.
Installation Logistics and Practical Considerations
Beyond the technical procedure, several practical factors affect any cage armor fitting operation. Understanding these logistics helps commanders and maintenance teams plan effectively.
Can Anti Drone Cage Armor Be Installed in the Field?
Yes, anti-drone cage armor can be installed in field conditions, but with important caveats. Bolted cage kits are specifically designed for field installation and can be mounted using basic hand tools, a torque wrench, and a lifting device (a vehicle-mounted crane or improvised tripod). These kits typically use pre-drilled brackets that attach to existing vehicle hardpoints, eliminating the need for welding in the field.
However, welded installations — which offer superior strength — require workshop conditions with proper welding equipment, ventilation, and fire safety measures. For emergency field installation, Dengtai offers bolt-on rapid deployment kits that can be installed by two technicians in under two hours using nothing more than wrenches and a torque wrench. These kits sacrifice some structural rigidity for speed and simplicity.
Key considerations for field fitting include:
- Surface preparation: Field conditions make proper cleaning and surface prep difficult. Use a wire brush and solvent wipes as a minimum.
- Weather: Avoid installation in rain or high humidity if welding is required. For bolted kits, light rain is acceptable but dry conditions are preferred.
- Lighting: Adequate lighting is essential for aligning mounting brackets and verifying fastener torque. Plan for daytime installation or bring portable lighting.
- Security: A vehicle undergoing installation is vulnerable. Maintain security during the installation period.
How Long Does Anti Drone Cage Armor Installation Take?
Installation time varies significantly by vehicle type, kit design, and technician experience:
| Installation Type | Vehicle Type | Time Estimate | Personnel Required |
|---|---|---|---|
| Bolted kit (rapid deployment) | Light tactical vehicle (HMMWV, JLTV) | 1-2 hours | 2 technicians |
| Bolted kit (standard) | Medium truck (HEMTT, MTVR) | 3-4 hours | 2-3 technicians |
| Welded kit | Main battle tank (M1 Abrams, Leopard 2) | 6-8 hours | 3-4 technicians + welder |
| Full custom fabrication | Any vehicle | 2-3 days | 4-5 technicians + welder |
First-time installations take 30-50% longer than repeat installations on the same vehicle type. Most units report that after completing 2-3 installations, technicians achieve the standard times listed above. Pre-assembly of frame sections on the ground before lifting onto the vehicle can reduce overall installation time by up to 25%.
What Vehicles Can Have Anti Drone Cage Armor Installed?
Anti-drone cage armor can be installed on virtually any military vehicle, but the design and mounting approach must be tailored to each platform. Common vehicle categories include:
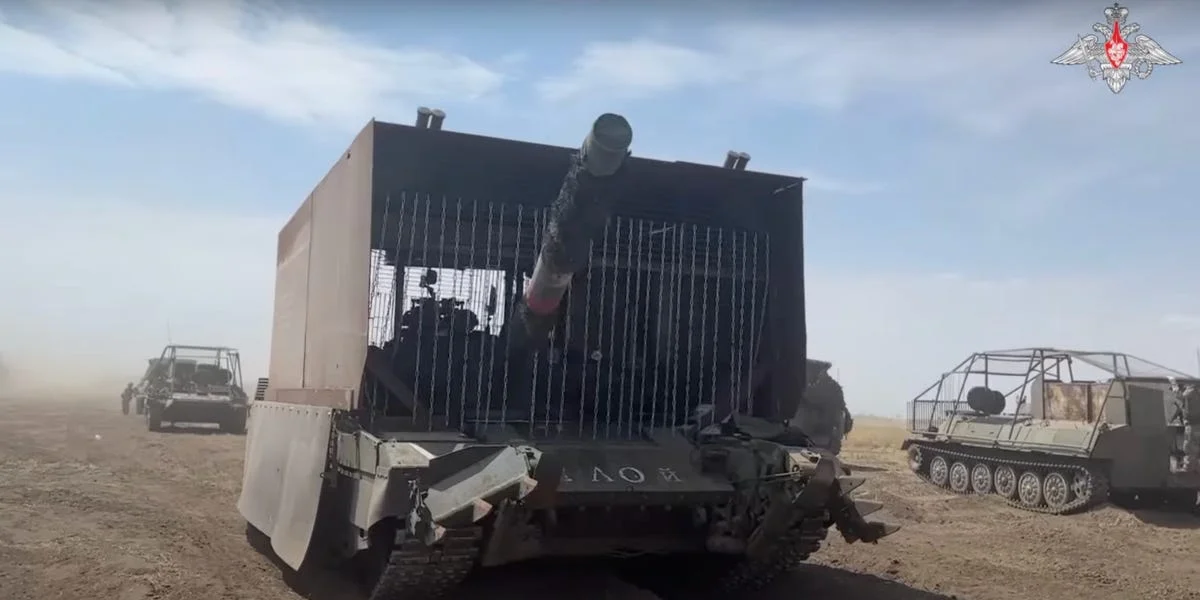
- Main battle tanks (MBTs): Abrams, Leopard 2, Challenger 2, T-72/T-90 — tank top cages protect the vulnerable turret roof and engine deck. These require custom-fit solutions due to turret traverse and weapon systems.
- Infantry fighting vehicles (IFVs): Bradley, CV90, BMP series — roof and side cages protect troop compartments. Lighter construction requires careful weight management.
- Armored personnel carriers (APCs): M113, Stryker, LAV — full perimeter cages provide 360-degree protection. Modular bolt-on designs are common.
- Light tactical vehicles: HMMWV, JLTV, MRAP — lighter-duty cages using thinner steel (3-4 mm) to stay within payload limits.
- Logistics and support vehicles: HEMTT, MTVR, fuel tankers — partial cage coverage over cab and critical components. Often use bolted kits for fleet-wide deployment.
- Artillery and air defense platforms: Howitzers, SAM launchers — exposed crew areas and sensitive electronics require custom cage layouts.
Dengtai offers pre-engineered kits for over 30 military vehicle platforms, with custom solutions available for specialized or export vehicles. Each kit is vehicle-specific, ensuring proper fitment without modification to the host platform.
Do Anti Drone Cages Work Against Military-Grade UAVs?
While we have established that anti-drone cages are effective against small drones and FPV threats, their performance against larger, military-grade UAVs requires separate analysis. The answer depends on the specific UAV class and attack profile.
Do Anti Drone Cages Protect Against Drone Attacks from Military-Grade UAVs?
Military-grade UAVs such as the TB2 Bayraktar, MQ-9 Reaper, and loitering munitions like the Switchbline or Lancet present a different challenge. These systems are larger (50-1000 kg), fly faster (150-300 km/h), and carry significantly larger warheads (5-50 kg). Against such threats, a standard anti-drone cage provides limited protection on its own.
However, anti-drone cages do protect against smaller military-grade UAVs and loitering munitions in the 10-30 kg class. The key factor is the kinetic energy at impact — if the cage frame can absorb the impact energy without catastrophic failure, the standoff detonation principle still applies. For these threats, the cage must use heavier steel (6-8 mm frame, 4-6 mm mesh) and reinforced mounting brackets capable of withstanding forces 5-10 times greater than those from a small FPV drone.
Against large military UAVs carrying heavy anti-tank warheads, the cage alone is insufficient. In these scenarios, the anti-drone cage serves as a secondary layer within a comprehensive defense system that includes electronic warfare (EW) jamming, radar detection, and kinetic interceptors. The cage can still provide benefit by catching smaller submunitions and shrapnel from near-miss attacks.
Effectiveness Comparison by Threat Type
| Threat Type | Weight | Impact Speed | Cage Protection Level |
|---|---|---|---|
| Commercial quadcopter (DJI Phantom) | 1-2 kg | 40-60 km/h | High — reliably stopped |
| Small FPV drone with RPG warhead | 3-5 kg | 60-100 km/h | High — 80-90% survival rate |
| Large FPV / custom attack drone | 8-15 kg | 80-120 km/h | Moderate-High — depends on steel thickness |
| Loitering munition (Lancet, Switchblade) | 10-30 kg | 120-200 km/h | Moderate — heavy cage required |
| Military UAV (TB2, MQ-9 class) | 100-1000 kg | 200-300 km/h | Low — cage alone insufficient; use layered defense |
The bottom line: anti-drone cages are highly effective against the most common battlefield drone threats — FPV drones, quadcopters, and small UAVs. For military-grade threats, they remain a valuable component of a layered defense but should not be relied upon as the sole protection measure.
Professional Anti Drone Cage Armor Installation Services
For military units that lack in-house metal fabrication capabilities or require a turnkey solution, professional installation services are available from several specialized manufacturers and defense contractors.
Who Offers Anti Drone Cage Armor Installation Services?
Several companies provide comprehensive services that include vehicle assessment, custom fabrication, mounting, and post-installation testing:
- Dengtai Defense: Offers full installation services for all major vehicle platforms, including on-site deployment teams that can travel to forward operating locations. Dengtai provides both bolt-on and welded kits with certified welders experienced in military vehicle armor modifications.
- OEM armor packages: Some vehicle manufacturers now offer factory-installed anti-drone cage armor as a production option on new vehicles. This is the preferred approach for new production vehicles as the cage is integrated into the vehicle design from the outset.
- Depot-level maintenance facilities: Many military depots have developed in-house capability to fabricate and install anti-drone cage armor during scheduled maintenance rotations. This approach leverages existing infrastructure and reduces per-unit cost.
- Local fabrication shops: In theater, many units have successfully partnered with local metal fabrication shops for emergency support. Quality can vary significantly — proper specifications and quality control oversight are essential.
What to Look for in an Installation Provider
When selecting a professional service provider, consider the following criteria:
- Military vehicle experience: The provider must have proven experience working with armored vehicles and understanding the unique constraints of armored steel welding and mounting.
- Certified welders: All welding personnel should hold current certifications for structural steel welding (AWS D1.1 or equivalent) and ideally have experience with military armor steel.
- Vehicle-specific tooling: The provider should have access to vehicle-specific lifting fixtures, alignment jigs, and torque specifications for the platforms being outfitted.
- Quality assurance program: Look for documented QA processes including weld inspection, torque verification, and post-installation testing procedures.
- Rapid deployment capability: For operational units, the provider should be able to deploy installation teams to the unit location and complete work on an operational timeline.
- Post-installation support: Warranty, repair services, and spare parts availability are important for maintaining the cage over its service life.
Dengtai Defense provides all of these capabilities and maintains a global support network for rapid response installation and repair services. Contact the Dengtai sales team for a consultation on your specific vehicle platforms and operational requirements.
Conclusion
The process of fitting anti-drone cage armor to military vehicles has transitioned from an improvised field modification to a standard engineering procedure with well-defined specifications, tools, and quality standards. As drone threats continue to evolve, the ability to properly install and maintain these protective systems has become a core competency for modern military forces.
To review the key takeaways:
- Steel thickness matters: Use 3-4 mm for light threats, 5-6 mm for heavy threats. The anti drone cage armor steel thickness must be matched to the expected threat environment.
- Proper installation is critical: Follow the five-phase procedure: assessment, base frame mounting, panel attachment, finalization, and testing. Every step affects the system battlefield performance.
- Field installation is possible with bolt-on kits, while welded installations offer maximum strength but require workshop conditions.
- Plan for 2-8 hours depending on vehicle type and kit complexity, with 2-4 trained technicians.
- Anti-drone cages are highly effective against the most common threats (FPV drones, small UAVs) and provide a valuable layer of protection against larger military-grade systems.
- Professional installation services are available from Dengtai Defense and other qualified providers for units that need turnkey solutions.
Investing in a proper cage armor fitting today will pay dividends in crew protection and vehicle survivability on tomorrow battlefield. Whether you are equipping a single vehicle or an entire fleet, follow the guidelines in this guide to ensure your anti-drone cage armor performs as designed when it matters most.
For detailed technical specifications, vehicle-specific installation manuals, or to discuss your requirements with an engineer, contact the Dengtai team. We support military forces worldwide with high-quality anti-drone cage armor solutions and professional installation services.